Saturday 31 October 2015

椰香黄梨三明治 & 椰香面包干Coconut Pineapple Sandwiches & Coconut Sugar Rusks (空气炸锅版 / Air Fryer Version)

椰子油除了可以用来煮食和直接饮用,用于烘焙或用来涂抹于面包都很适合。液体状的椰子油要涂抹于面包当三明治就有点困难,不过如果将椰子油放入冰箱冷藏让其凝固,就会比价容易涂抹于面包。椰子油的温度只要在24度或以下就会开始凝固,所以有时我们从超市或商店买的椰子油是白色凝固状的,但当拿回家放在室温一下子后椰子油就会开始溶化,变成透明的液体状。凝固的椰子油可以用来代替牛油,除了可以涂抹在面包上,吃松饼或格子松饼时加入一起吃也不错。椰子油有特殊的香味,加入在甜点里一起吃会让食物的香味更上一层,所以将一罐椰子油冷藏在冰箱里,需要时随时都可以派上用场。


我很喜欢椰子和黄梨,也喜欢这两个食材配搭一起的味道,刚好家里还有自制的黄梨酱,所以就做了椰香黄梨三明治来当下午茶。用了三明治模具来切割面包,剩下的面包皮也蛮多的,我不想浪费丢弃这些面包皮,所以就顺手加了些椰子油和糖混合,然后放入Air Fryer里烘一烘,把不要了的面包皮摇身一变,变成美味的椰香面包干。椰香面包干又香又脆,当零嘴非常适合,和小时候吃的Roti Kok差不多一样,只不过这个版本是用了比较健康的椰子油和原蔗糖来做的。


凝固的椰子油 Solidified coconut oil


椰香黄梨三明治

材料:
全麦面包 4片
黄梨酱 3汤匙(自制或市售)
凝固椰子油 适量(食谱请往下看)

做法:
1. 把一些凝固的椰子油涂抹于面包的两面。
2. 把一片面包放在占板上,将1 1/2汤匙的黄梨酱涂抹于面包中心。把另一片面包盖上。一直重复做法,直到用完所有面包。
3. 把面包放入微波炉里加热30秒,让面包软化,方便将面包封边及切割。
4. 把四方形的三明治模具放在面包上,用力压以封边及切割面包成口袋三明治。
5. 把空气炸锅预热至170°C。将三明治放在空气炸锅的烤盘里,炸3分钟或至金黄色即可。用利刀把三明治切半成长方形即可享用。

如何准备凝固的椰子油
1. 在一个玻璃罐子里装入适量的椰子油,盖好收入冰箱冷藏至凝固。如果凝固的椰子油太硬,难涂抹于面包,你可以从冰箱取出,放置在室温一下子,让其软化。


份量:2份口袋三明治


Coconut Pineapple Sandwiches

Ingredients:
4 slices of wholemeal bread
3 tbsp pineapple jam (Homemade or store bought)
Some solidified coconut oil (please refer below for the recipe)

Method:
1. Spread some solidifed coconut oil on both sides of bread.
2. Place 1 slice of bread on a cutting board, spread 1 1/2 tbsp of pineapple jam at the center, then top with another slice of bread. Repeat until all breads are used up.
3. Microwave the breads for 30 seconds, this is to warm and soften the bread so that the edges of the breads will seal easily.
4. Put the square sandwich cutter on top of the breads, press hard to cut out and seal off the edges.
5. Preheat air fryer to 170°C. Place the sandwiches on the grill pan and air fry for 3 minutes or until golden brown. Use a sharp knife to cut the sandwiches into half to form rectangles, then arrange on serving plate. Serve immediately.

To make solidified coconut oil:
1. In a jar, add the desired amount of liquid coconut oil. Cover the jar and chill it in the refrigerator until the coconut become solid. If the solidified coconut oil is too hard to spread, you can take it out from refrigerator and leave it in room temperature for a while to let it soften.


Servings: 2 pocket sandwiches
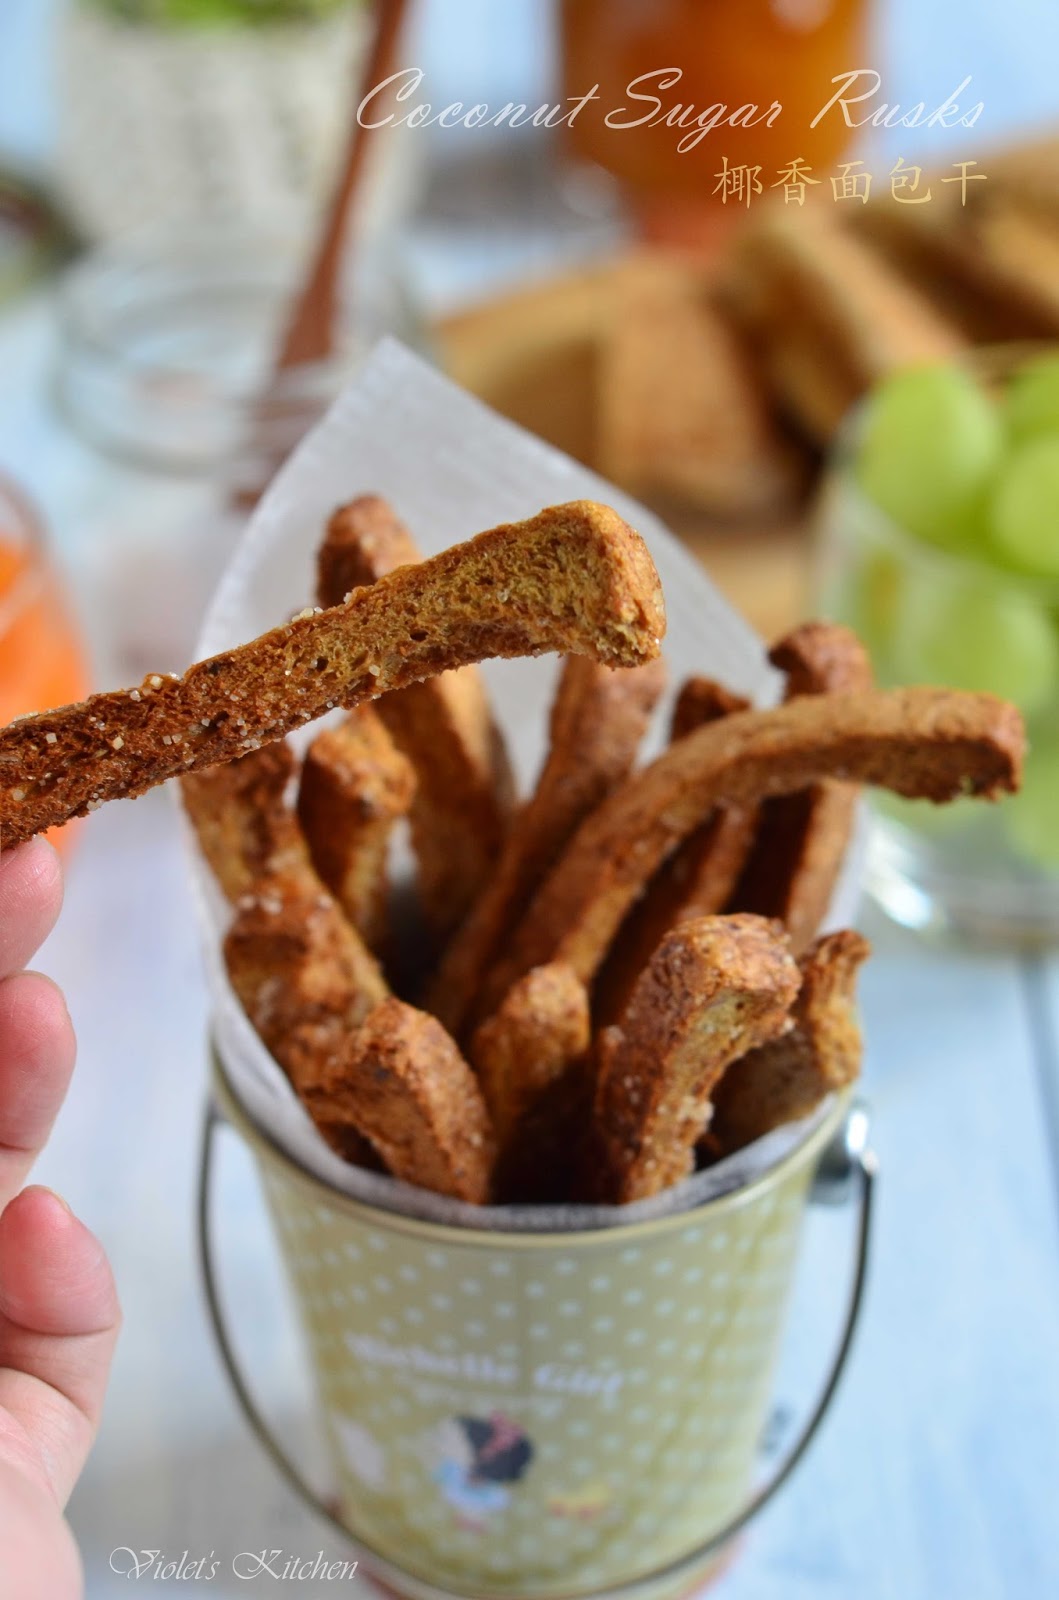


椰香面包干

材料:
面包皮 150克
有机纯椰子油 2汤匙
有机原蔗糖 1汤匙

做法:
1. 将面包皮切成条装。在一个碗里混合面包皮、椰子油和糖,混合至面包皮都沾上糖。
2. 把空气炸锅预热至170°C。将面包皮铺排在空气炸锅的烤盘里,炸8-10分钟或至香脆及干。


Coconut Sugar Rusks

Ingredients:
150 g bread crust
2 tbsp organic extra virgin coconut oil
1 tbsp organic raw cane sugar

Method:
1. Cut bread crusts into long strips. In a mixing bowl, combine bread crusts, coconut oil and sugar.  mix until the bread crusts are coated with sugar.
2. Preheat air fryer to 170°C. Arrange the bread crusts on air fryer grill pan and air fry for 8-10 minutes or until crispy and dry.


This post is linked to the event Little Thumbs Up (Oct 2015 : Coconut) organised by Zoe of Bake for Happy Kids and Doreen of My Little Favourite DIY and hosted by Jess from Bakericious.


Friday 30 October 2015

万圣夜怪异眼球宾治 Spooky Halloween Eyeball Punch

昨天上的帖子眼球果冻看起来有点恐怖,希望不会吓到大家。我从网上也看到不少万圣夜主题的宾治的食谱,不过这些都是带酒精成份的,我比较喜欢一些简单而且没酒精的宾治。想起了上次圣诞节做了石榴宾治,味道挺不错的,颜色又红红的,像血水一样。不过我懒得准备糖浆,所以就直接用已经带甜味的雪碧柠檬味汽水。红色的宾治加入了眼球果冻,看起来就像眼球浸泡在血水里,蛮恐怖的!


万圣夜怪异眼球宾治 

材料:
椰水冰块:
椰水 2杯

宾治:
石榴汁 2杯
雪碧柠檬味汽水 2罐

装饰:
眼球果冻 适量
“假血” 适量

做法:
1. 椰水冰块:将椰水平均倒入冰块模里,然后放入冰箱结成冰块,备用。
2. 将石榴汁分别倒入4个玻璃杯里,然后装入椰水冰块和眼球果冻,最后再倒入雪碧柠檬味汽水,用“假血”装饰即可饮用。


份量:4杯


Spooky Halloween Eyeball Punch

Ingredients:
Coconut juice ice cubes:
2 cups coconut juice

Punch:
2 cups pomegranate juice
2 cans Sprite soft drink

For garnish:
Some Eyeball Jelly
Some fake blood

Methods:
1. To make coconut juice ice cubes: Fill the ice cubes tray with coconut juice and place in the freezer until frozen.

2. Pour the pomegranate juice into 4 serving glasses. Fill the glasses with some coconut juice ice cubes and eyeball jelly, then pour the Sprite soft drink into the glasses until almost full. Garnish with some fake blood. Serve immediately.


Servings: 4 glasses


This post is linked to the event Little Thumbs Up (Oct 2015 : Coconut) organised by Zoe of Bake for Happy Kids and Doreen of My Little Favourite DIY and hosted by Jess from Bakericious.


Thursday 29 October 2015

万圣夜怪异眼球果冻 Spooky Halloween Eyeball Jelly

手指面包与南瓜浓汤后我再来一个恐怖诡异的眼球果冻,我做这果冻纯粹因为好玩和想拍照。去年就看到类似的食谱,不过由于时间关系却没有去行动,这些眼球果冻时我趁帮佣还没回前赶紧做了,要不然过后忙家务,长时间内都不会有空去做这些果冻。


眼球果冻的颜色都是天然的,白眼球是用椰浆做成的,蓝色的虹膜是用蓝花做的,而瞳孔就是用市售的仙草。我用了蒟蒻果冻粉来做,所吃起来的口感会QQ的。这眼球果冻几可乱真,再加以“假血”装饰,怪异得来又有点恐怖,非常配合万圣夜的主题。


万圣夜怪异眼球果冻

材料:
眼球果冻:
水晶蒟蒻果冻粉 5克(Jim-Willie牌子)
糖 60克
椰漿 200毫升
冷水 225毫升
水 30毫升
蓝花 / 蝶豆花 10朵

“假血”:
玉米糖漿 适量
红色素 数滴

做法:
1. 将一片约3mm厚度的仙草冻放在占板上,以吸水管切割出小圆形,然后排在球状冰块模内作为“瞳孔”。

2. 将30毫升的水和10朵蓝花放入一个小碗里,放入微波炉里加热1分钟。把蓝花汁过滤备用。

3. 在一个碗里混合水晶蒟蒻果冻粉和糖。把冷水、水晶蒟蒻果冻粉和糖放入一个小锅里,搅拌至均匀,然后开中火加热,煮至水晶蒟蒻果冻粉和糖完全溶化。将果冻液煮滚,然后调至小火。

4. 把25毫升的果冻液倒入一个小碗里,与蓝花汁混合均匀。以1/4茶匙的量匙将蓝花果冻液勺入冰块模,作为“虹膜”。把冰块模放入冰箱冷冻库里2-3分钟至果冻凝固,但不要放至冷冻。

5. 把椰浆加入果冻液里,搅拌均匀,然后煮至滚即可熄火。将椰浆果冻液过滤,然后倒入冰块模里,收入冰箱冷藏至凝固。

6. 将玉米糖漿与红色素混合均匀,做成“假血”。把眼球果冻脱模,放入玻璃杯中,以“假血”装饰即可享用。


份量:28粒眼球果冻(2个球状冰块模)


Spooky Halloween Eyeball Jelly

Ingredients:
Eyeball Jelly:
5 g Konnyaku jelly powder (Jim-Willie brand )
60 g sugar
200 ml coconut milk
225 ml cold water
30 ml water
10 blue pea flowers

For the "Blood":
Some corn syrup
Few drops of red colouring

Method:
1. Place a slice of grass jelly (about 3mm in thickness) on cutting board, use a straw to cut out small round shape as the "Pupil". Then place the "Pupil" ball shaped ice cubes trays.

2. Place 30ml water and 10 blue pea flowers in a small bowl, microwave for 1 minute,. Strain the blue pea flower juice and set aside until ready to use.

3. Mix Konnyaku jelly powder and sugar in a bowl. In a saucepan, add 225ml cold water and jelly powder-sugar mixture, stir until well combine. Turn on the heat and cook the mixture over medium heat, stir until the jelly powder and sugar fully dissolved. Bring the jelly mixture to boil, then turn to low heat.

4. Pour 25ml jelly mixture into a small bowl, mix well with blue pea flower juice. Use a 1/4 teaspoon to spoon the blue color mixture into ice cubes trays to make "Iris". Place the ice cubes trays into freezer for 2-3minutes to let the jelly set but not frozen

5. Add coconut milk to the jelly mixture, stir well and bring to boil, turn off the heat. Strain the coconut jelly mixture and pour into the ice cubes trays and chill it in refrigerator until set.

6. To make "blood", mix corn syrup with few drops of red colouring, stir until well combine. Unmould the eyeball jellies, place the jellies in glasses, garnish with some "blood" and the eye balls are ready to serve.


Yields; 28 eyeballs (2 ball shaped ice cubes trays)


This post is linked to the event Little Thumbs Up (Oct 2015 : Coconut) organised by Zoe of Bake for Happy Kids and Doreen of My Little Favourite DIY and hosted by Jess from Bakericious.


Wednesday 28 October 2015

椰子隔夜燕麦 Coconut Overnight Oats

准备椰子炖燕窝的时候我有额外买多一粒椰子来做椰子隔夜燕麦。之前曾用过椰浆来浸泡隔夜燕麦,味道很香很浓,还算不错,不过这次我就选择用比较清甜的椰水来浸泡隔夜燕麦。虽然加了优格后味道带点酸,不过还可以接受,下次可以考虑加入椰浆,可能味道会比较搭配。除了用椰水浸泡燕麦,我还将椰肉切条状,连同椰糖和烤椰丝一起加入在燕麦里,绝对是名符其实的椰子隔夜燕麦。家里刚好有烤椰丝,所以就顺手加入,如果没有的话也可以用干椰丝来代替。挖空椰肉后的椰子壳如果丢弃的话感觉很可惜,所以我就将燕麦装入椰子盅里,让这营养早餐看起来就更特别,感觉像在吃甜品一样。


椰子隔夜燕麦

材料:
椰水 1/2杯
原味优格 1/2杯
燕麦 1/2杯
奇异籽 1茶匙
椰糖 1汤匙,或更多(切碎)
新鲜嫩椰肉 1/2杯(切条状)
胡桃 1/4杯(烤香切碎)
烤椰丝 2汤匙

做法:
1. 在一个清洁的玻璃罐子里混合椰水、优格、燕麦、奇异籽和椰糖,盖好,收入冰箱冷藏至隔夜。
2. 隔天早上加入椰肉、胡桃和烤椰丝,搅拌均匀即可享用!


份量:1人


Coconut Overnight Oats

Ingredients:
1/2 cup coconut juice
1/2 cup yogurt
1/2 cup rolled oat
1 tsp chia seeds
1 tbsp palm sugar / Gula Melaka, or more to taste, chopped
1/2 cup young coconut flesh, cut into strips
1/4 cup pecan, toasted and chopped
2 tbsp grated coconut, toasted

Methods:
1. In a clean jar, mix the coconut juice, yogurt, rolled oat, chia seeds and palm sugar. Cover the jar and chill it in the refrigerator overnight.

2. In the morning, top the oatmeal with coconut flesh, pecan and grated coconut, mix well and enjoy!


Serving: 1


This post is linked to the event Little Thumbs Up (Oct 2015 : Coconut) organised by Zoe of Bake for Happy Kids and Doreen of My Little Favourite DIY and hosted by Jess from Bakericious.


椰香烤鸡腿 Ayam Panggang Rempah | Spicy Roast Chicken (空气炸锅版 / Air Fryer Version)

上星期五为家人准备了马来风味的晚餐,主菜是椰香烤鸡腿,再配与椰油黄姜饭和腌黄瓜与黄梨,然后再准备Sirap Bandung Soda作为饮料。鸡肉先用香料和椰浆腌制过,然后再放入Air Fryer里烤至熟,烤的时候整个厨房充满香味,令人非常期待,烤好后的鸡肉呈金黄色,就连那些一起烤的腌料也烤得香香的,非常下饭。由于之前准备腌料时买多了黄姜,所以就干脆将黄姜连同印度米、椰油和香兰叶一起煮,准备健康版的黄姜饭。


椰油黄姜饭 + 椰香烤鸡腿 + 腌黄瓜与黄梨 + Sirap Bandung Soda


椰香烤鸡腿

(食谱参考《最美味鸡肉佳肴》,第78页,做少许更改)

材料:
鸡全腿 4个

腌料:
芫茜籽 4汤匙(烘香)
干辣椒 15条(剪断,浸泡至软,沥干)
红葱头 12粒
蒜头 12瓣
黄姜 30克
南姜 90克
香茅 6支(取下半部)
椰浆 200毫升
食油 100毫升
黄糖 2汤匙
盐 2茶匙


做法:
1. 把腌料材料放入食物处理器里,搅拌至顺滑,然后均匀地抹在鸡全腿上,放入冰箱腌至少4小时或隔夜。

2. 把空气炸锅预热至180°C。在空气炸锅的烤盘里铺上一张铝箔纸,把腌好的鸡肉放在铝箔纸上,烤大约15分钟。以腌料涂抹在鸡肉,然后再继续烤15分钟或至金黄及熟即可。盛出,乘热享用!


备注:
*炸的时间视鸡肉的大小而定,请自行调整。我将鸡全腿分成两批来烤。


Ayam Panggang Rempah | Spicy Roast Chicken

(Recipe adapted from A passion for chicken, pg. 78, with some adjustments)

Ingredients:
4 chicken whole legs

Marinade:
4 tbsp coriander seeds, toasted
15 dried chillies, cut into sections and soaked in water to soften, drained
12 shallot
12 cloves garlic
30 g turmeric
90 g galangal
6 stalks lemongrass, used bottom part only
200 ml thick coconut milk
100 ml cooking oil
2 tbsp brown sugar
2 tsp salt

Method:
1. Place all the marinade ingredients in a blender and blend until smooth paste. Marinate the chicken for at least 4 hours or overnight in refrigerator.

2. Preheat air fryer to 180°C. Line the air fryer grill pan with a piece of aluminium foil, then arrange the chicken whole legs on the aluminium foil. Bake the chicken for about 15 minutes. Baste the chicken with some marinade mixture, and continue to bake for another 15 minutes or until the chicken is golden and cooked. Dish out and serve hot.


*The time of baking is depending on the size of the chicken, please adjust accordingly. I baked the chicken whole legs in two batches.


This post is linked to the event Little Thumbs Up (Oct 2015 : Coconut) organised by Zoe of Bake for Happy Kids and Doreen of My Little Favourite DIY and hosted by Jess from Bakericious.


Tuesday 27 October 2015

番薯蛋 Sweet Potato Balls (空气炸锅版 / Air Fryer Version)

一看到MiMi Bakery的番薯蛋时心里就在想我一定要尝试这食谱,刚好家里买了一包Cilembu蜜糖番薯,又甜又绵密,我想拿来做番薯蛋应该会很最适合吧!蜜糖番薯再加上新鲜椰丝,做出来的番薯蛋十分好吃。以前做年糕番薯丸时曾经试过用空气炸锅来炸,这次我也是用同样的方法来炸番薯蛋,不过在炸之前我在番薯蛋表面搽些椰子油,这样炸出来的番薯蛋会更香。


这次准备番薯蛋时我让小宝贝参与其中,小宝贝时常玩Play Dough,所以搓番薯蛋的面团一点也难不倒她,不过搓着搓着,结果番薯蛋都被小宝贝压扁成番薯饼。做好后我们将这些番薯饼煎来吃,想不到用椰子油煎的蕃薯饼特别香,外脆内软。小宝贝对自己动手的蕃薯饼特别有兴趣,几个小蕃薯饼一下子就吃完了,而且吃得很开心。


番薯蛋

(食谱参考MiMi Bakery House,做少许更改)

材料:
番薯 500克(蒸熟压烂,我用Cilembu蜜糖番薯)
糯米粉 200克或更多
有机原蔗糖 180克
新鲜椰丝 150克

做法:
1. 将番薯蒸至软,乘热压烂。
2. 将番薯泥和其他材料混合,揉成面团。
3. 以1汤匙的量匙勺出番薯面团,搓成球状,一直重复做法直到用完所有面团。
4. 把空气炸锅预热至170°C。以椰子油涂抹于番薯蛋表面,然后把番薯蛋排放在空气炸锅的烤盘里,炸大约10分钟或至香脆及呈金黄色即可。盛出,乘热享用!


备注:
*炸的时间视番薯蛋的大小而定,请自行调整。


Sweet Potato Balls

(Recipe adapted from MiMi Bakery House, with some adjustments)

Ingredients:
500 g sweet potato, steamed & mashed (I used Cilembu Honey Sweet Potato)
200 g glutinous rice flour, or more
180 g organic raw cane sugar
150 g fresh grated coconut

Method:
1. Steam the sweet potato until soft, mashed it while it's still hot.
2. Add the mashed sweet potato into the rest of the ingredients and knead into a dough.
3. Using a tablespoon to scoop out a dough and roll into a roll ball. Repeat the process until the dough is used up.
4. Preheat air fryer to 170°C. Coat the sweet potato balls with coconut oil, then arrange the sweet potato balls on the air fryer grill pan. Air fry the sweet potato balls for 10 minutes or until crispy and golden brown. Dish out and serve warm.


Note:
*The time of frying is depending on the size of the sweet potato balls, please adjust accordingly.


This post is linked to the event Little Thumbs Up (Oct 2015 : Coconut) organised by Zoe of Bake for Happy Kids and Doreen of My Little Favourite DIY and hosted by Jess from Bakericious.


Related Posts Plugin for WordPress, Blogger...