Wednesday, 24 June 2015

意式香草与牛奶焦糖酱奶油布丁 Vanilla and Dulce de leche Panna Cotta

上几个星期购物时看到常买的那个鲜奶油在做促销,三包一起买的价钱比较便宜,所以就一口气买了六包回来,两包已经拿来做牛奶焦糖酱雪糕了,还有四包在冰箱等着我。有好一段时间没吃Panna Cotta,有点想念那口感顺滑而且奶味浓郁的甜品,冰箱里的鲜奶油和牛奶焦糖酱也刚好可以派上用场。Panna Cotta是一种意大利甜点,意思是煮过的奶油,意式奶油布丁的做法是将奶油,牛奶和糖混合加热,让后加入鱼胶使其凝结。做布丁时只想要用完整包的牛奶和鲜奶油,没考虑到杯子的容量,所以除了照片中的那两杯布丁,还多出了半杯的布丁。


最近的天气真的是热得令人受不了,就算风扇的速度调到最高后仍然会流汗。看来这样的热天气还会延续下去好几个星期,所以一定要多喝水,避免中暑。炎热的天气请大家吃杯口感顺滑的意式香草与牛奶焦糖酱奶油布丁消消暑,希望大家喜欢!


意式香草与牛奶焦糖酱奶油布丁

材料:
牛奶焦糖酱层:
牛奶 100毫升
鲜奶油  100毫升
牛奶焦糖酱 100克
无味鱼胶粉 1茶匙
水 2汤匙

香草层:
牛奶 100毫升
鲜奶油  100毫升
糖 2汤匙
无味鱼胶粉 1茶匙
水 2汤匙
云尼拉香精 1茶匙

做法:
牛奶焦糖酱层:
1. 在一个小碗里加入水,然后撒上鱼胶粉,放置一旁大约5分钟。
2. 在一个小锅里加入牛奶、鲜奶油和牛奶焦糖酱,搅拌至均匀。将混合物煮至微滚,然后加入鱼胶液,搅拌至完全溶化即可。放置一旁直到牛奶焦糖酱混合液降至室温。
3. 把玻璃杯子斜放于面包烤盘里,然后倒入牛奶焦糖酱混合液倒入杯中,收入冰箱冷藏1至2小时或直到凝固。

香草层:
1. 在一个小碗里加入水,然后撒上鱼胶粉,放置一旁大约5分钟。
2. 在一个小锅里加入牛奶、鲜奶油、糖和云尼拉香精,搅拌至均匀。将混合物煮至微滚,然后加入鱼胶液,搅拌至完全溶化即可。放置一旁直到香草混合液降至室温。
3. 把香草混合液倒在已凝固的牛奶焦糖层上,收入冰箱冷藏至完全凝固。淋上额外的牛奶焦糖酱即可享用!


Vanilla and Dulce de leche Panna Cotta

Ingredients:
Dulce de leche layer:
100 ml milk
100 ml whipping cream
100 g Dulce de leche
1 tsp unflavoured gelatin
2 tbsp water

Vanilla layer:
100 ml milk
100 ml whipping cream
2 tbsp sugar
1 tsp unflavoured gelatin
2 tbsp water
1 tsp Vanilla essence

Method:
Dulce de leche layer:
1. In a small bowl sprinkle the gelatin over the water and let stand for 5 minutes.
2. In a saucepan, add milk, whipping cream and Dulce de leche, stir until well combine. Bring the mixture to a simmering boil. Add in the gelatin mixture, stir until completely dissolved. Set aside and let it cool down to room temperature.
3. Place the glasses tilted in loaf pans and pour the mixture into the glasses. Keep in refrigerator for 1 to 2 hours or until set.

Vanilla layer:
1. In a small bowl sprinkle the gelatin over the water and let stand for 5 minutes.
2. In a saucepan, add milk, whipping cream, sugar and vanilla essence, stir until well combine. Bring the mixture to a simmering boil. Add in the gelatin mixture, stir until completely dissolved. Set aside and let it cool down to room temperature.
3. Pour the mixture over the set Dulce de leche layer. Keep in refrigerator until set. Drizzle with additional Dulce de leche and serve!


This post is linked to the event Little Thumbs Up (June 2015 Event: Cream) organised by Zoe of Bake for Happy Kids and Doreen of My Little Favourite DIY and hosted by Diana of The Domestic Goddess Wannabe.


Friday, 19 June 2015

牛奶焦糖酱雪糕 Dulce de leche Ice Cream

这几天准备了好几罐牛奶焦糖酱,准备做成不同的甜品,其中一款就是牛奶焦糖酱雪糕。其实我很少会在家里准备雪糕,老公对雪糕的要求很高,因为之前他工作的那家公司卖的雪糕品质非常好,所以家里自制的雪糕未必可以符合他的要求。不过这特别的口味是例外,国外可能会有牛奶焦糖酱口味的雪糕,不过本地暂时还没看到。


看到了Jasline的香草雪糕时我就在想这个方法可不可以用在牛奶焦糖酱雪糕里呢?她的食谱非常简单,只用了三种材料,鲜奶油、炼奶和香草精华,不需要用到雪糕机,而且冷冻过程中不需要取出数次来搅拌。以前准备的雪糕都是需要煮蛋黄,制作方面的步骤较多,所以这次我就用了这个较简单的方法,只用了两种材料就可以做成特别口味的雪糕。我用了鲜奶油和牛奶焦糖酱,打法鲜奶油后和牛奶焦糖酱拌匀即可送入冰箱冷冻,冷冻数小时后就可以享用美味的雪糕了。这牛奶焦糖酱雪糕带着很香浓的牛奶味,吃起来不会有冰渣的口感。只需两种材料就可以做成的雪糕,而且做法又简单,你还在等什么呢,赶紧动手吧!


牛奶焦糖酱雪糕

材料:
动物性鲜奶油 400毫升
牛奶焦糖酱 300克

做法:
1. 准备一个不锈钢碗,下面放一盆冰水。把300毫升的鲜奶油倒入不锈钢碗,然后打发至硬。
2. 把牛奶焦糖酱和100毫升的鲜奶油混合在一个碗里,用电动打蛋器以低速打至混合。
3. 将打发的鲜奶油拌入牛奶焦糖酱混合液里。
4. 把雪糕混合液倒入冷冻用的容器里,放入冰箱冷冻至少8小时或隔夜。


Dulce de leche Ice Cream

Ingredients:
400 ml dairy whipping cream
300 g Dulce de leche

Method:
1. Prepare a stainless steel bowl over ice water bath. Place 300ml of whipping cream in the bowl and beat until stiff peaks form.
2. Place Dulce de leche into a mixing bowl, pour in 100ml of whipping cream. Using a hand mixer, beat on low speed until well combined.
3. Fold in the whipped cream into Dulce de leche mixture.
4. Pour the mixture into a freezer safe container and freeze for at least 8 hours or overnight.


This post is linked to the event Little Thumbs Up (June 2015 Event: Cream) organised by Zoe of Bake for Happy Kids and Doreen of My Little Favourite DIY and hosted by Diana of The Domestic Goddess Wannabe.


牛奶焦糖酱 Dulce de leche

牛奶焦糖酱Dulce de leche(发音为"DOOL-se de LE-che",在西班牙语中是牛奶糖或者是牛奶果冻的意思)是一种饱满而丰富的酱或者果酱,味道跟焦糖很像。然而,跟用融化的糖制成的焦糖不同,牛奶焦糖酱是由加热的甜炼乳做成的。牛奶焦糖酱在很多南美国家都是很常见的,包括阿根廷和乌拉圭。(资料来源wikiHow

wikiHow提供了八种制作牛奶焦糖酱的做法,我就选择最简单的做法,罐装熬制法。不过我没有在罐上面开孔,我直接就将整罐炼乳放入锅里煮,我敢用这个方法是因为之前焖鲍鱼也是用同一个方法,试过后觉得只要小心一点就没问题。wikiHow的做法里有给提示如果没有在罐上开孔的话,罐子可能会隆起并且有爆炸的危险,所以如果要将整罐没开孔的炼乳放入锅里煮就必须额外小心,要时不时查看水位有没有盖过罐子,水温会不会过热。为了安全起见我就等罐子完全冷却后才开罐。一打开罐子就闻到了很香的牛奶,拿了点来试味,很甜很浓牛奶味,味道跟焦糖酱很相似,不过牛奶味就比较浓些。


之前曾看到一些部落客提到全脂炼乳在马来西亚找不到,这也让我以为在这边买不到了,所以在几个星期前老公往新国出差时我就托他帮我带了几罐Milkmaid炼乳回来,其实当时是我疏忽,没注意看那些帖子的日期,现在这边有得卖了。我是在Sonia家看到她的牛奶焦糖酱才发现其实F&N从新推出了全脂炼乳,所以现在在各大超市都可以买到。为了尝试两个不同品牌的炼乳,我也买了罐F&N炼乳回来试一试。


从网上看到的牛奶焦糖酱都有不同的浓稠度和色泽,相比之下我的第一罐牛奶焦糖酱的颜色的浓度似乎不达标,无奈我已经开了罐,不能再放回水里煮,结果就倒出来放在小锅里煮至浓稠。有了第一次的经验后我就知道需要控制火力,太小火的话牛奶焦糖酱的颜色和浓稠度都不是很好。还好接着的几次出来的成品都不错。煮滚后我全程都使用中小火来煮(我是用电陶炉火力4号,最强火力是10号),下面的前三张照片是煮了三小时的牛奶焦糖酱,而最后的三张是煮了四小时的牛奶焦糖酱,两者的色泽和浓稠度都不太一样,所以要比较稀或浓的牛奶焦糖酱就请自行调整煮的时间。家里的五罐炼乳都给我做成牛奶焦糖酱了,一罐把来做雪糕,一罐拿来做戚风蛋糕,另两罐装入玻璃罐里收在冰箱,打算拿来做成其他甜品,而最后一罐打算送给姐姐。我觉得牛奶焦糖酱的味道很香,除了做成甜品外,直接拿来涂抹在饼干或面包上应该会很好吃,或者是淋在雪糕或布丁上也是不错的选择!


牛奶焦糖酱

(食谱参考wikiHowNasi Lemak Lover)

材料:
全脂炼乳 1罐

做法:
1. 把炼乳罐头的标签去掉,不要打开罐头。
2. 将罐头放入一个深锅里,以一块布垫底,加入适量的水在锅里,确定水位高过罐头大约两寸, 如水位降低就加入适量的热水。
3. 把锅放在炉子上,开火加热,煮至水滚,然后就将火力调小,煮约3-4小时。
4. 煮好后将罐头从锅里取出,放置一旁让其完全冷却。把罐头打开,即可享用。


Dulce de leche

(Recipe adapted from wikiHow and Nasi Lemak Lover)

Ingredient:
1 can of full cream condensed milk

Method:
1. Remove the label from the can of condensed milk. Do not open the can.
2. Place the can in a deep pot that fill with enough water and put a rag under the can. Make sure the water level is about 2 inches above the can, add hot water as needed.
3. Place the pot on the stove and bring it to boil. Once the water is boiled, lower the heat and simmer for about 3-4 hours.
4.  Once done, remove the can from hot water and set aside to let it cool completely. Open the can and enjoy the Dulce de leche!


Thursday, 4 June 2015

班兰戚风蛋糕 Pandan Chiffon Cake

班兰戚风蛋糕是一款充满回忆的蛋糕,一款伴着大家长大的蛋糕,我从小就开始吃班兰戚风蛋糕,就算到了现在结婚了生孩子了,我还是一样爱吃。不过很可惜的是现在市售的班兰戚风蛋糕都添加了香精和颜色素,真正用班兰叶来做的戚风蛋糕也很难再找到了。


上星期接到Fion的邀请一起玩班兰戚风蛋糕,心想时间允许的话这次一定要一起凑热闹。其实有一段时间没烘戚风蛋糕了,真的很怕失败。之前试做了两次烫面法的班兰戚风蛋糕都烤得矮矮的,应该是蛋白打得不好吧,不过还好口感还蛮不错。原本也有点想要放弃了,过后翻食谱书时看到另一个班兰戚风蛋糕的食谱,心想倒不如再试多一次吧!所以我又再开炉烤蛋糕了,这次很怕失败,一直往烤箱看,还好烤出来的蛋糕还算不错,也来得及参加这次的派对。比起之前的那个烫面戚风蛋糕,这个食谱的戚风蛋糕颜色比较淡,没之前的那个那么翠绿,不过淡淡的绿色也是蛮美的。其实想用自制班兰香精,不过时间紧逼,来不及准备了。之前的烫面戚风蛋糕用了15片班兰叶连同椰浆一起搅拌取汁,做出来的蛋糕颜色非常讨好,非常翠绿,下次可以继续用这方法来准备班兰戚风蛋糕。


班兰戚风蛋糕

(食谱参考戚风蛋糕出炉了,第45页,做少许更改)

材料:
蛋黄面糊:
蛋黄 6个
班兰香精 1/2茶匙
班兰汁 50毫升
椰浆 100毫升
盐 1/4茶匙
食油 4汤匙
细砂糖 20克
低筋面粉 140克

蛋白霜:
蛋白 6个
塔塔粉 1/2茶匙
细砂糖 80克

做法:
1. 蛋黄面糊:在搅拌盆中拌匀蛋黄、班兰精华、班兰汁、椰浆、盐、食油和细砂糖,拌入面粉,搅拌均匀备用。
2. 蛋白霜:将蛋白和塔塔粉打发呈粗泡沫状,将细砂糖分次加入,继续打发至硬性发泡。
3. 把蛋白霜分数次粉次加入蛋黄糊中,轻轻拌均匀成面糊。
4. 把面糊倒入不涂油的9寸(22公分)空心烘盘里铺平,盛入预热烤箱以170ºC烘约30-40分钟至熟。
5. 取出蛋糕,倒扣在桌子上,待完全冷却。


Pandan Chiffon Cake

(Recipe adapted from Chiffon Cake Is Done, pg. 45, with some minor adjustments)

Ingredients:
Egg yolk batter:
6 egg yolks
1/2 tsp pandan paste
50 ml pandan juice
100 ml coconut milk
1/4 tsp salt
4 tbsp cooking oil
20 g caster sugar
140 g cake flour

Egg white foam:
6 egg whites
1/2 tsp cream of tartar
80 g caster sugar

Method:
1. To make egg yolk batter, combine egg yolks, pandan paste, pandan juice, coconut milk, salt, cooking oil and caster sugar in a mixing bowl. Fold in flour until forms batter.
2. To make egg white foam, beat egg whites and cream of tartar until mixture forms soft peaks. Gradually add in sugar, beating at high speed until frothy and stiff peaks form.
3. Gently fold beaten egg white foam into egg yolk batter until blended.
4. Pour batter into ungreased 9-in (22cm) tube pan. Bake in preheated oven at 170ºC for 30-40 minutes or until cooked.
5. Remove from oven, invert cake onto table until completely cooled.


I'm submitting this post to the Best Recipes for Everyone June 2015 Event (Theme: Secret of Chiffon & Roll Cakes) organized and hosted by Fion of XuanHom's Mom.


Saturday, 30 May 2015

椰汁芋头西米露 Taro and Sago Dessert in Coconut Milk

现在较新型购物商场里的育婴室设备都会比较好比较齐全,有些甚至设有爸爸们专用的育婴室,不过最近我却发现因这些育婴室设备太好太齐全而频频让一些人士滥用。一些育婴室设有女士厕所,是给带着小孩的母亲们专用的,结果却变成给在那里上班的售货员“专用”。育婴室里都会设有冷热饮水机,我试过在帮小宝贝换尿片时看到一位身穿购物商场制服的妙龄女士进来,原以为她须要挤母乳,结果却看到她把水瓶拿了出来往饮水机那里装水,晕! 今天看到的另一件事更加离谱,一位女士拿着名牌手袋,手里拿着会计专业课程的书,结果特地从外面进去育婴室里的哺乳专用室洗手,而且洗完手后还不会顺手把灯关掉,到最后还是我去帮她关。门上面已近贴着告示说明是给带着婴孩的母亲专用的,可是这女士却连这样简单的英文也“看不懂”!真的很不明白现在的人,个个都衣着光鲜,可是行为却很可耻很不文明!!不吐不快,发了牢骚,现在心里舒服多了,不好意思耽搁的大家的时间,接下来看回今天的主题 - 甜品。


每次如果家里有买芋头可是又用不完时我就会将剩下的芋头切块煮西米露。可是每次煮都是将全部材料煮成一锅,有时控制不好西米又很快就会沾锅底了,所以这次我尝试将材料分开准备,煮出来的西米露果然比较好味。我将一半的芋头搅拌成茸,混合在糖水里,让这西米露吃起来更香更浓芋头味,而且不须勾芡也可以让糖水也有点浓稠的感觉。这个月的最佳食谱主题是“我最爱的甜品”,原以为这个月不会上贴子,结果不知不觉就上了八款甜品的帖子,今天再送上一款甜品给大家作为结尾,希望大家会喜欢这个椰汁芋头西米露。


椰汁芋头西米露

材料:
西米 100克
水 1500毫升
椰浆 200毫升

芋头甜汤:
芋头 400克(去皮,切块)
水 800毫升
糖 1/2杯,或更多

做法:
1. 将1500毫升的水放入锅内煮滚,加入西米以中火煮10分钟,偶尔搅拌一下以防止西米沾锅。10分钟后熄火,加盖让西米静置10分钟。以流动的水冲洗煮好的西米,然后沥干放入一个碗里备用。

2. 芋头糖水:
将芋头蒸大约40分钟或直到软化。将800毫升的水放入锅内煮滚,加入糖,搅拌至完全溶解。把一半蒸好的芋头放入,以手动式搅拌器将芋头打至幼滑。把另一半芋头块和椰浆加入锅里,以中小火煮至滚即可熄火。

3. 上桌:
将适量的芋头甜汤勺入碗里,加入2-3汤匙的西米,搅拌均匀即可享用。冷热皆可。


份量:4 - 6人份


Taro and Sago Dessert in Coconut Milk

Ingredients:
100 g sago
1500 ml water
200 ml coconut milk

Taro sweet soup:
400 g taro, skin and cubed
800 ml water
1/2 cup sugar, or more to taste

Method:
1. To prepare sago:
Bring 1500ml water to boil, add sago and cook over medium heat for 10 minutes. Stir occasionally to prevent them from sticking to the pot. After 10 minutes remove from heat, cover the pot with lid. Let it stand for 10 minutes. Rinse the cooked sago with running water. Drain and transfer the sago to a bowl, set aside until ready to use.

2. To prepare taro sweet soup:
Steam the taro for about 40 minutes or until soften. Bring 800ml water to boil. Add sugar and stir until fully dissolved. Add half of the steamed taro to the sweet soup, blend the taro using hand held blender until smooth. Add the remaining steamed taro and coconut milk, cook over medium low heat until it comes to boil, then turn off the heat.

3. To serve:
Ladle the taro sweet soup into a bowl, add 2-3 tbsp of sago, mix well and enjoy! Serve warm or chilled.


Serving: 4 - 6


I'm submitting this post to the Best Recipes for Everyone May 2015 Event (Theme: My Favourite Desserts) organized by Fion of XuanHom's Mom and co-hosted by Aunty Young


Thursday, 28 May 2015

芒果肠粉 Mango Cheong Fun

五月初时原本打算暂时不上帖子,所以就常常煲港剧和看一些美食节目,刚好就看到了肥妈的芒果肠粉,这款甜品卖相很特别,用特制的芒果味粉皮将芒果条卷起来,再淋上一些椰浆和撒上芝麻,橙色和白色的配搭相当吸引人。其实很想尝试这个食谱,因为粉皮是用木薯粉和芒果泥做成的,感觉一定很香很Q,不过可惜食谱里没有提供液体的份量,所以我就只好放弃,另寻其他食谱


其实芒果肠粉和芒果捞河的材料都是一样的,只是前者是用蒟蒻果冻将芒果条包起来,而后者是将蒟蒻果冻切成条状,伴与芒果丁一起吃。做这个芒果肠粉真的有点难度,蒟蒻果冻做成的肠粉皮太滑了,要将芒果厚条卷起来真的是很难,包了好几次才成功。芒果肠粉和芒果捞河这两款甜品都是很容易准备,煮好的蒟蒻果冻在室温很快就凝固了,加上准备芒果泥、芒果丁和芒果条只须要很短的时间,所以在大约半个小时内就可以完成了。这两款甜品除了容易准备,材料的价钱也不会太贵,一包水晶蒟蒻果冻粉、两盒椰浆和四粒芒果就可以做成八人份的甜品。之前做了四款芒果甜品,这个芒果肠粉是最后一款了,连续吃了两个星期的芒果,看来也是该暂时停一停了。


芒果肠粉

材料:
蒟蒻肠粉:
水晶蒟蒻果冻粉 5克
糖 60克
椰漿 200毫升
冷水 250毫升

香兰燕菜:
燕菜粉 1/4茶匙
清水 75毫升
香兰香精 1/8茶匙
糖 1 1/2茶匙

芒果丁与芒果酱:
芒果 2粒 (我用golden water lily mango)
食用水 40毫升
糖 20克

装饰:
烤香芝麻 适量

做法
1. 蒟蒻肠粉:
在一个小锅里把冷水和蒟蒻粉混合,搅拌至无颗粒,然后加入糖,煮至滚。转至中小火,加入椰浆继续煮多一分钟即可熄火。将蒟蒻混合液倒在长方形平盤上(15 X 13寸),斜绕一圈,以便形成均匀和薄薄的一层。放置一旁待凉,然后收入冰箱冷藏备用。

2. 香兰燕菜:
将所有材料放入一个锅里,以中火煮至滚即可,倒入一个四方形平盘里,放置一旁待凉和凝固。将凝固的香兰燕菜切成细丁,做成撒在表面的葱花,收入冰箱冷藏备用。

3. 芒果丁与芒果酱:
将芒果去皮切成四个厚条。把剩余的芒果肉约150克、食用水和糖入搅拌机内,搅拌至幼滑,做成芒果酱。把芒果条和芒果酱收入冰箱冷藏备用。

4. 上桌:
把蒟蒻果冻从冰箱取出,切成四片。把芒果条放在蒟蒻肠粉皮上,卷起来成条状。将芒果肠粉块状放入盘中,淋上芒果酱,撒上一些芝麻和香兰燕菜丁即可食用。


份量:4人份


Mango Cheong Fun

Ingredients:
Konnyaku cheong fun:
5 g Konnyaku jelly powder
60 g sugar
200 ml coconut milk
250 ml cold water

Pandan agar-agar:
1/4 tsp agar-agar powder
75 ml water
1/8 tsp pandan paste
1 1/2 tsp sugar

Mango cubes and puree:
2 mangoes (I used golden water lily mango)
40 ml water
20 g sugar

For garnish:
Some toasted white sesame

Method:
1. Konnyaku cheong fun:
In a saucepan mix the cold water and konnyaku powder, stir until no lumps remain.  Add sugar and bring the mixture to boil. Turn to medium low heat, add coconut milk and cook for another minute, then turn off the heat. Pour the mixture into a rectangular pan (15" X 13"), swirl it around so it forms a thin and even layer. Set aside and let it cool down, then chill it in the refrigerator until ready to use.

2. Pandan agar-agar:
Place all ingredients in a small saucepan, bring the mixture to boil over medium heat. Pour the mixture into a small square pan, set aside. Let it cool down and set. Dice the agar-agar and use it as mock spring onion. Chill it in the refrigerator until ready to use.

3. Mango cubes and puree
Peel the mango and cut it into 4 thick strips and the remaining mango flesh cut into chunks. To make mango puree, combine mango chunks (about 150g), water and sugar into a blender, blend until smooth. Chill the mango puree and mango strips in refrigerator until ready to serve.

4. To serve:
Remove the konnyaku cheong fun from refrigerator and and cut into 4 pieces. Place the mango strips on the konnyaku cheong fun and roll them up and transfer to serving plates. Drizzle the mango cheong fun with mango puree. Sprinkle with some toasted sesame seeds and garnish with diced pandan agar-agar. Serve immediately.


Serving: 4


备注:
我用Jim-Willie牌子的水晶蒟蒻果冻粉,根据包装指示,一包10克的水晶蒟蒻果冻粉须要950毫升的液体。我只用了5克的水晶蒟蒻果冻粉,所以我将液体调整至450毫升(200毫升椰浆+ 250毫升水)。

Note:
I used Jim-Willie brand konnyaku jelly powder, according to package directions, the total amount of liquid for a packet of 10g konnyaku jelly powder is 950 ml. As I only used 5g for this recipe, so I adjusted the amount of liquid to 450ml (200ml coconut milk + 250ml water).


I'm submitting this post to the Best Recipes for Everyone May 2015 Event (Theme: My Favourite Desserts) organized by Fion of XuanHom's Mom and co-hosted by Aunty Young


Tuesday, 26 May 2015

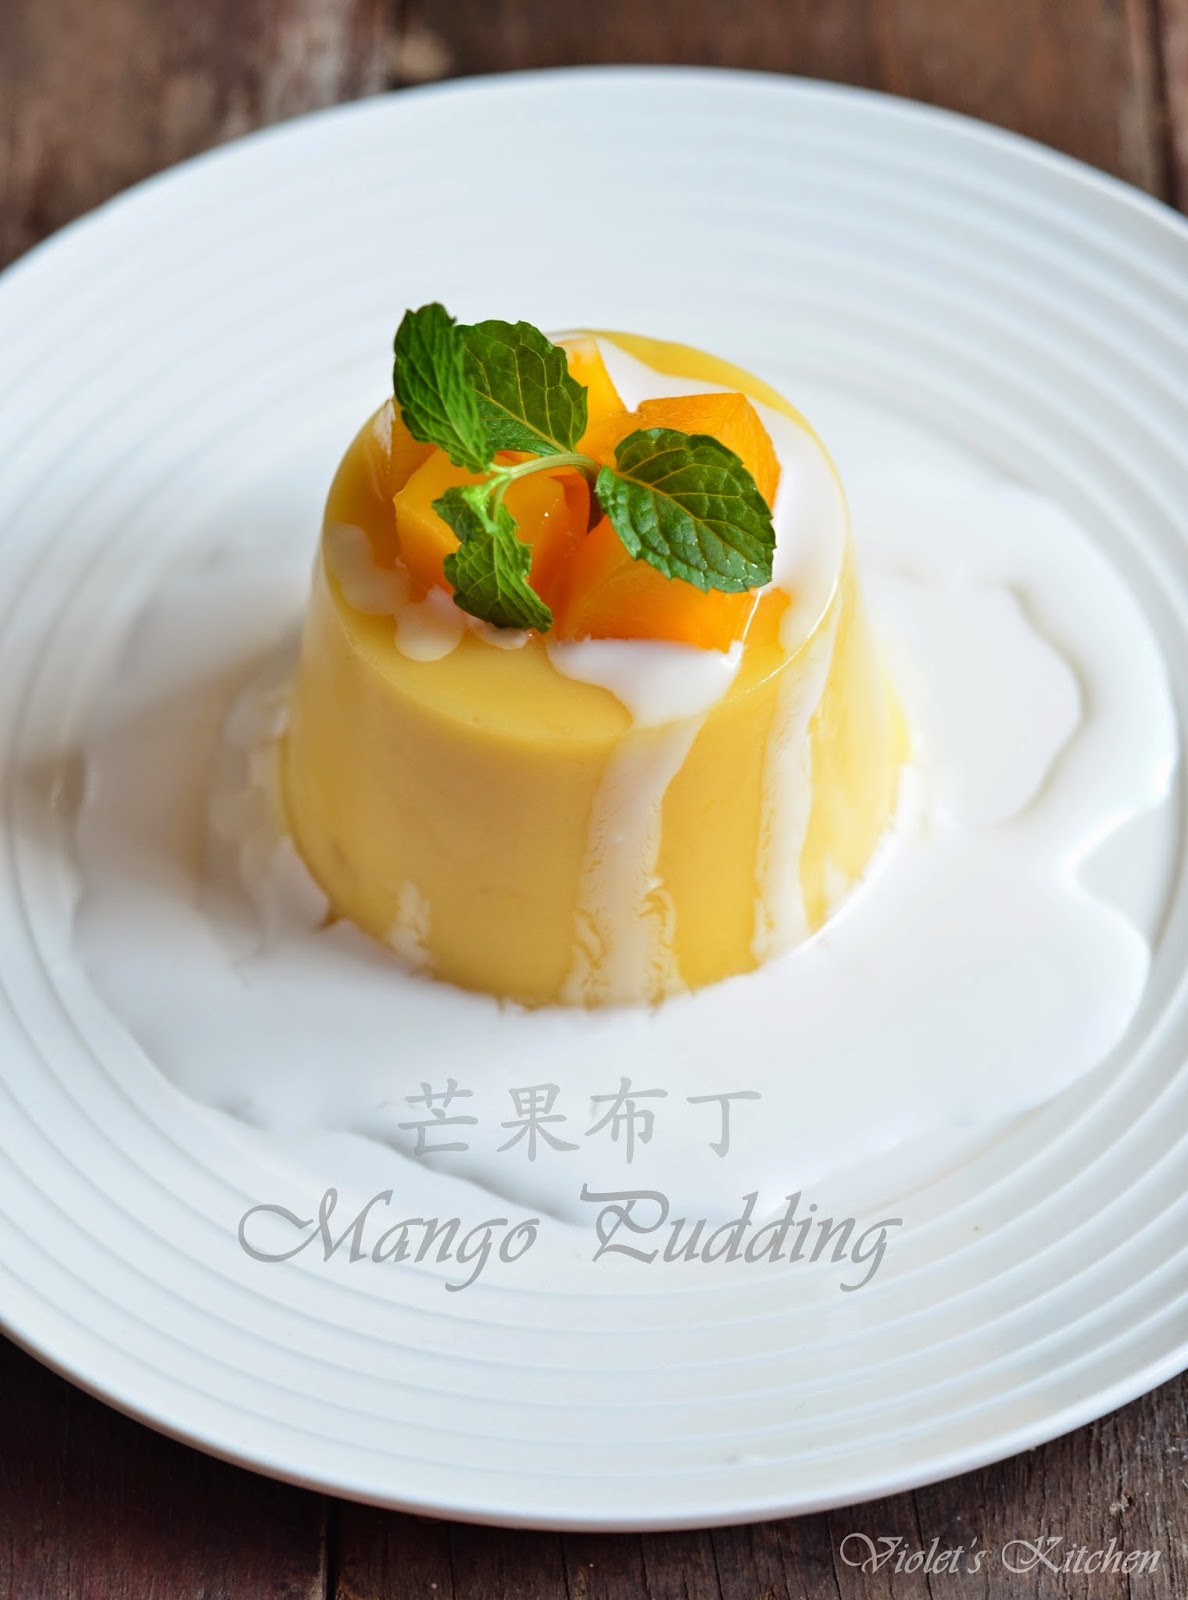
芒果布丁 Mango Pudding

以前我很喜欢吃市售的布丁,里面有加入椰果的,布丁滑滑的,椰果QQ的,口感非常讨好,不过为了健康理由现在就很少吃了。向来家人就比较喜欢燕菜的口感,所以我就用了燕菜粉和新鲜的芒果来做芒果布丁。熟透了的芒果非常甜,颜色呈橙黄色,所以做出来的布丁的颜色也很漂亮。曾看过一些芒果布丁的食谱有加入优格饮料,我也想尝试一下,可是刚好家里没有,所以我就用了家里剩下的芒果优格来代替。加入了优格的芒果布丁甜中带点酸,淋上椰浆伴与芒果丁一起吃别有一番风味。


芒果布丁

材料:
燕菜粉 10克
水 400毫升
芒果优格 150毫升
新鲜芒果泥 450毫升
糖 1/3杯或更多

做法:
1. 在一个碗里,把芒果泥和优格混合至均匀,备用。将水放入锅里煮至滚,加入糖和燕菜粉,转至小火煮至燕菜完全溶化。

2. 把布丁混合液煮至滚,然后转至小火,把芒果泥混合物倒入,搅拌至均匀即可熄火。

3. 将布丁液倒入模具里,让它冷却,然后收入冰箱冷藏。将布丁倒模,淋上少许椰浆,伴与芒果丁一起享用。


Mango Pudding

Ingredients:
10 g agar-agar powder
400 ml water
150 ml mango yogurt
450 ml mango puree
1/3 cup sugar, or more to taste

Method:
1. In a bowl combine mango puree and yogurt, set aside. Bring the water to boil. Add sugar and agar-agar powder, lower the heat and simmer till agar-agar is fully dissolved.

2. Bring the mixture to a boil, then turn to low heat. Pour in the mango puree mixture, stir to mix well then turn off the heat.

3. Pour the pudding mixture into the moulds. Allow it to cool and let the pudding set in the refrigerator. Unmold the pudding and transfer to serving plates, drizzle with some coconut milk and serve with diced mango.


This post is linked to the event Little Thumbs Up (May 2015 Event: Yogurt) organised by Zoe of Bake for Happy Kids and Doreen of My Little Favourite DIY and hosted by Cheryl of Baking Taitai.


I'm also submitting this post to the Best Recipes for Everyone May 2015 Event (Theme: My Favourite Desserts) organized by Fion of XuanHom's Mom and co-hosted by Aunty Young


Related Posts Plugin for WordPress, Blogger...