Showing posts with label 茶叶 Tea Leaves. Show all posts

Thursday, 30 July 2015

茶叶蛋 Chinese Marbled Tea Egg

其实我很喜欢吃茶叶蛋,每次在商场逛经过茶店或药材店时都会被摆在店外的那锅茶叶蛋的味道给吸引住, 不过却很少会停下来买,因为怕麻烦,而且带着小孩要边走边吃也不容易。偶然看到一个不错的茶叶蛋食谱,发觉要在家自己准备茶叶蛋一点也不难,只需一些茶叶和香料就行了。


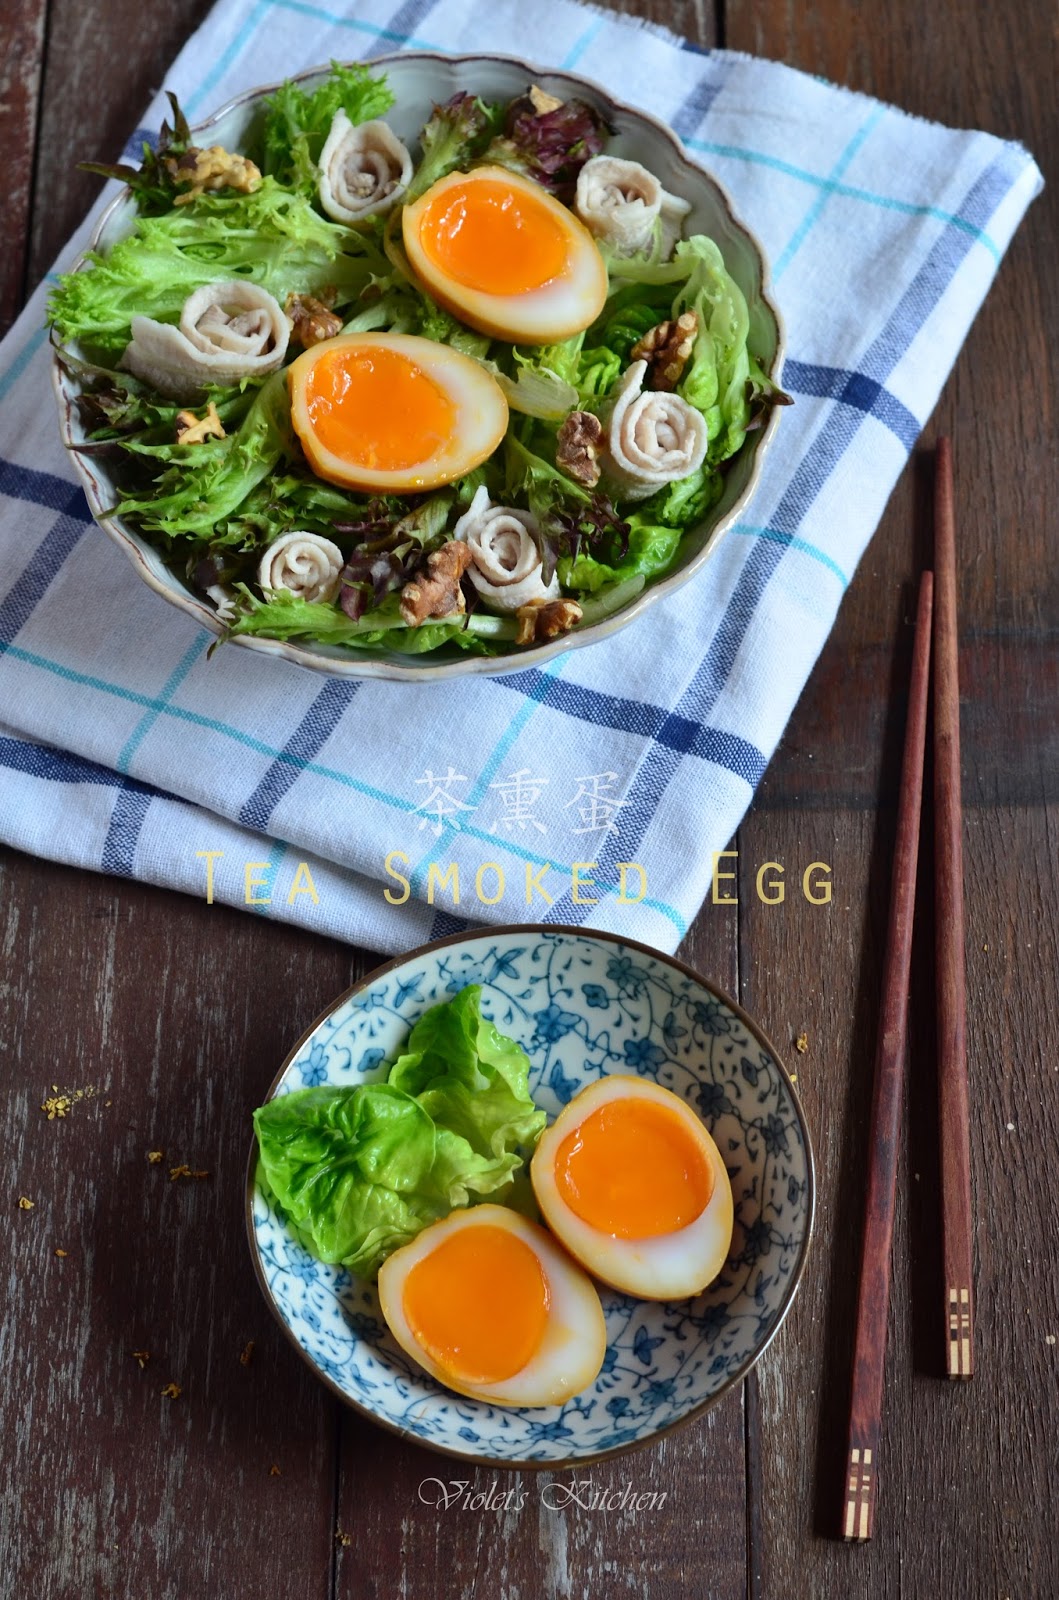
我特地选用了普洱茶来煮这茶叶蛋,因为普洱茶的颜色较深,想必然出来的花纹颜色也会比较漂亮。虽然茶叶蛋是一种小吃,不过家人没什么吃小吃的习惯,而且放工回来大家都直接吃晚餐了,所以我就把茶叶蛋列入昨晚的晚餐菜肴之一。对于这次的茶叶蛋我还蛮满意的,因为每一颗茶叶蛋的花纹都很漂亮,而且也很入味,我想下一次煮茶叶蛋时我也会用回一样的食谱。


虽然只浸泡大约三小时,不过花纹也挺明显的。


(左上)甘草、普洱茶、陈皮
(左下)草果、桂皮、八角


茶叶蛋

(食谱参考Steamy Kitchen,做少许更改)

材料:
鸡蛋 8粒
酱油 1/2杯
老抽 2汤匙
冰糖 1汤匙
桂皮 2寸
八角 2个
草果 1个
甘草 5克
陈皮 5克
普洱茶 30克

做法:
1. 将鸡蛋轻轻放入一个中型锅里,注入适量的水,直到可以盖过鸡蛋大约1寸的高度。把水煮滚,然后转至中火煮3分钟。把蛋取出,放在流动的水下让蛋冷却。

2. 用茶匙背轻轻敲于蛋壳,敲得越多越仔细,花纹就会也多,必须小心敲以确保蛋壳不会脱落下来。

3. 在另一个锅里加入1.5公升的水,加入鸡蛋及其他材料。煮至滚,然后转至小火煮2小时。煮好后加盖让蛋浸泡数小时或放入冰箱里至隔夜。浸泡的时间越长,茶叶蛋也就会更入味,而且花纹的颜色也会更明显。


Chinese Marbled Tea Egg

(Recipe adapted from Steamy Kitchen, with some adjustments)

Ingredients:
8 eggs
1/2 cup soy sauce
2 tbsp dark soy sauce
1 tbsp rock sugar
1 2-inches cinnamon stick
2 star anise
1 Cao Guo
5 g Licorice root
5 g mandarin orange peel30 g Pu-er tea leaves

Methods:
1. Gently place the eggs in a medium pot and fill with water to cover the eggs by 1-inch. Bring the pot to a boil, lower the heat and let simmer for 3 minutes. Remove the eggs and let cool under running cool water.

2. Using the back of the teaspoon, gently tap the eggshell to crack the shell all over. The more you tap, the more intricate the design. Do this with a delicate hand to keep the shell intact.

3. In another pot add 1.5 litre of water, add eggs and the remaining ingredients. Bring the mixture to a boil and immediately turn the heat to low. Simmer for 2 hours, cover with lid and let eggs steep for a few hours to overnight in the fridge. The longer you steep, the more flavorful and deeply marbled the tea eggs will be.


This post is linked to the event Little Thumbs Up (July 2015 Event: Tea) organised by Zoe of Bake for Happy Kids and Doreen of My Little Favourite DIY and hosted by Cheryl of Baking Taitai.


Sunday, 26 July 2015

茶熏蛋 Tea Smoked Egg

我家的茶熏蛋终于可以亮相了,第一次太过生,第二次不小心让蛋黄液流掉一大半,第三次终于成功了!试煮这么多次溏心蛋,最满意就是这次了!用来做燻蛋的蛋最好选用鸭蛋,因为鸭蛋的蛋黄颜色较鲜艳,做出来的溏心效果会比较美,而且鸭蛋吃起来的口感也比较Q。鸭蛋的蛋壳会比较硬,剥壳时会比较难,不过如果将蛋放在流动的水下,让水流进蛋壳与内膜之间,那剥蛋壳就会变得比较容易。


为了方便,我提早一天就把蛋准备好,浸泡在卤汁里一晚,让蛋充分入味,隔天取出熏一下子就可以吃了。我家小宝贝已经很会剥蛋壳了,平时准备给她的水煮蛋都是她自己剥壳的,如果看到我要剥蛋壳她一定会吵着要帮忙,所以我只好提早一天准备。除了鸭蛋我也有试过用鸡蛋来做熏蛋。如果用鸡蛋的话溏心部份会比较水,不过两种蛋做出来的溏心蛋都各有各的特色,要选择哪种蛋就视乎你喜欢哪种口感。现在的鸭蛋不会太难找,一般的超市都可以买到,我家的鸭蛋也是从超市买回来的。


近期打算走些较健康的路线,所以就准备了沙拉来当晚餐,不过老公是非常爱吃肉的人,一下子要他吃整大碗的青菜是时比较困难,所以我在沙拉里加入了水煮五花肉片、茶熏蛋和烤核桃,让翠绿的沙拉不再单调,颜色和口感也更加丰富。我比较喜欢清爽的酱汁,所以就准备了和风酱汁来搭配我的那份沙拉,而老公比较喜欢浓郁的味道,我就用了市售的深煎芝麻醬来做沙拉酱。其实偶尔准备沙拉当晚餐也不错,不但有饱足感,而且也比较健康。


茶熏蛋

材料:
鸭蛋 2粒(每粒重65克)
卤汁 1杯(做法参考这里

烟熏料:
茶叶 10克
黄糖 100克
白米 100克

做法:
1. 准备溏心蛋:
煮一锅水,水滚后转至中火,加入鸭蛋煮6分钟。不断搅动以确保蛋黄保持在中间。鸭蛋煮好后立即从热水中取出,用流动的水冲洗,然后将鸭蛋放入一盆冷水中浸泡5分钟。

把鸭蛋从冷水中取出,用茶匙背轻轻敲打蛋壳,然后小心地将蛋壳剥掉。把蛋放入一个碗或食物盒里,加入卤汁,腌至少1小时或放入冰箱里至隔夜。

2. 准备烟熏:
把锡箔纸铺平在锅内,加入白米、糖和茶叶。在锅内放入一个蒸架,把锅盖上,用大火加热。当锅盖边起烟时就将鸭蛋放在蒸架上,加盖烟熏3分钟,然后即可熄火。

3. 上桌
将熏蛋取出,抹上少许麻油,切半即可享用。


Tea Smoked Egg

Ingredients:
2 duck eggs (65g each)
1 cup of leftover poaching liquid (please see here for the recipe)

Tea-smoking mixture:
10 g tea leaves
100 g brown sugar
100 g uncooked white rice

Method:
1. To prepare soft boiled egg:
Bring a pot of water to boil. Turn to medium heat once the water starts boiling. Add duck eggs and cook for 6 minutes. Stir the eggs constantly, and this will help to centre the egg yolks. Once the duck eggs are cooked, remove immediately from hot water and rinse under running water. Transfer the eggs to a bowl of iced water and let them soak for 5 minutes.

Remove the eggs from iced water. Crack the shell with the back of a spoon and peel the egg gently. Place the peeled eggs in a bowl or food container, add leftover poaching liquid and let the eggs marinate for at least 1 hour or overnight in the refrigerator.

2. To smoke the egg:
Line the bottom of the wok with a piece of aluminium foil. Add rice, sugar and tea leaves. Put a steaming rack in the center, then cover the wok with a lid. Heat the wok over high heat till the smoke begins to appear. Place the eggs on the rack and cover the wok with lid. Smoke the eggs for 3 minutes, then turn off the heat.

3. To serve:
Remove the smoked eggs from wok. Brush with some sesame oil, cut into half and serve.


This post is linked to the event Little Thumbs Up (July 2015 Event: Tea) organised by Zoe of Bake for Happy Kids and Doreen of My Little Favourite DIY and hosted by Cheryl of Baking Taitai.


Friday, 24 July 2015

桂花茶熏鸡翅 Osmanthus Tea Smoked Chicken Wing

上星期煮了茶香熏豉油鸡,试了后就爱上那茶熏味,所以这星期我再以茶熏鸡,这次加了干桂花一起烟熏,让鸡翅吃起来带点淡淡的桂花香味。之前剩下的卤汁我保留了下来,加热后再用来卤这批鸡翅,鸡翅的肉会比较少,所以我缩短了煮鸡翅的时间,而浸泡鸡翅的时间同样是三个小时。当天的晚餐除了桂花茶熏鸡翅外,我还准备了溏心蛋,上次的溏心蛋太过生了,所以我想再次挑战,反正家里的鸭蛋还有很多,还好这次成功了。


其实这熏鸡翅除了可以当晚餐菜肴外,还可以拿来当前菜或下酒菜,或者是当派对里的小吃都不错,相信喜欢吃鸡翅的朋友们一定会喜欢这道熏鸡翅。


茶熏蛋的食谱我会留待下一次才分享,
因为当时的蛋切得不是太美,
而且一些蛋黄液在排盘时都流掉了。
隔几天后我从新煮过蛋,熏过后再拍了一些照片,
整理好后很快就会上帖子了。


桂花茶熏鸡翅

材料:
鸡翅膀 6个(分成翅棒腿和鸡中翅)
卤汁 1锅(做法参考这里

烟熏料:
茶叶 10克
黄糖 50克
白米 150克
干桂花 2汤匙

做法:
1. 豉油鸡翅:
在一个锅里把卤汁煮至滚,然后转至小火,将鸡翅加入煮10分钟,立即熄火离炉。将锅放置一旁,让鸡翅浸泡在卤汁里三个小时。三小时后将鸡翅取出,放入盘中。

2. 准备烟熏:
把锡箔纸铺平在锅内,加入白米、糖、干桂花和茶叶。在锅内放入一个蒸架,把锅盖上,用大火加热。当锅盖边起烟时就将鸡翅放在蒸架上,加盖烟熏8分钟,然后即可熄火。

3. 上桌
将熏鸡翅取出,抹上少许麻油,排盘即可享用。


Osmanthus Tea Smoked Chicken Wing

Ingredients:
6 chicken wings, cut into 2 pieces, the "flat" and the "drum"
1 pot of leftover poaching liquid (please see here for the recipe)

Tea-smoking mixture:
10 g tea leaves
50 g brown sugar
150 g uncooked white rice
2 tbsp dried osmanthus flower

Methods:
1. Soy Sauce Poached Chicken Wings:
Pour the braising liquid in a pot and bring to a boil, then turn to low heat. Add the chicken wings to the pot and poach for exactly 10 minutes, then turn off the heat and remove the pot from stove immediately. Allow the chicken wings to steep in the stock for 3 hours. After 3 hours remove the chicken wings from stock and transfer to a plate.

2. To smoke the chicken:
Line the bottom of the wok with a piece of aluminium foil. Add rice, sugar, dried osmanthus flower and tea leaves. Put a steaming rack in the center, then cover the wok with a lid. Heat the wok over high heat till the smoke begins to appear. Place the chicken wings  on the rack and cover the wok with lid. Smoke the chicken wings for 8 minutes, then turn off the heat.

3. To serve:
Remove the smoked chicken wings from wok. Brush some sesame oil on the chicken wings and serve.


This post is linked to the event Little Thumbs Up (July 2015 Event: Tea) organised by Zoe of Bake for Happy Kids and Doreen of My Little Favourite DIY and hosted by Cheryl of Baking Taitai.


Tuesday, 21 July 2015

茶香熏豉油鸡 Tea Smoked Soy Sauce Poached Chicken

这篇帖子是从新写过的,之前的那一篇不小心给我删除了。

之前一直很想尝试自己熏鸡,可是却怕熏坏锅子,过后发现家里有些旧锅摆了很久却没人用,所以决定用这锅子来试验自己熏鸡。我用回了之前玫瑰豉油鸡的做法,唯一不同的是我没加入玫瑰露,其实我参考了好几个不同的影片,发觉各有各的特色,不过最后还是选择这里的方法来熏鸡。熏鸡时用了铝箔纸来铺锅底是挺方便的,熏好后等一切熏料冷却后打包起来就可丢弃了,需要花费时间清洗的只有锅盖和蒸架。熏鸡时会产生大量的烟,所以请务必开抽烟机和打开厨房的窗口。


这茶香熏豉油鸡吃起来除了有原本的豉油味之外还加了一阵阵的茶熏味,是一道不错的菜肴,如果吃腻了一般的豉油鸡,那就花点心思,准备些熏料,让豉油鸡的香味和味道吃起来更有层次感。


茶香熏豉油鸡

材料:
豉油鸡:
鸡全腿 4个
清水 2公升
姜 4片
青葱 2棵(洗净,打结)
麻油 少许

香料:
桂皮 10克
甘草 10克
八角 8克
花椒 5克
草果 1个
姜 5片

调味料:
甜黑酱油 180克
酱油 80克
盐 1 1/2汤匙
冰糖 100克

烟熏料:
茶叶 10克(我用玫瑰红茶)
片糖 50克 (切碎)
白米 150克
干桂花 1汤匙

芡汁:
粟粉 1汤匙
清水 2汤匙

做法:
1.豉油鸡:
把香料装入即弃煲汤袋内,将2公升的水倒入锅内,放入煲汤袋,以大火煮至滚然后转小火煮1小时。把姜片、青葱和调味料加入卤汁内煮至滚,然后转至小火煮十五分钟,将鸡全腿加入煮14分钟,立即熄火离炉。将锅放置一旁,让鸡全腿浸泡在卤汁里三个小时。三小时后将鸡全腿取出,放入盘中。

2. 准备酱汁:
把 1 1/2杯的卤汁入小锅内煮滚,加入芡汁勾芡,煮至酱汁浓稠即可。

3. 准备烟熏:
把锡箔纸铺平在锅内,加入白米、糖、干玫瑰和茶叶。在锅内放入一个蒸架,把锅盖上,用大火加热。当锅盖边起烟时就将鸡全腿放在蒸架上,加盖烟熏8分钟,然后即可熄火。

4. 上桌
将熏豉油鸡取出,抹上少许麻油,斩件排盘,配以捞面或白饭一起享用。


Tea Smoked Soy Sauce Poached Chicken

Ingredients:
Soy Sauce Poached Chicken:
4 chicken whole legs
2 litres water
4 slices of ginger
2 stalks of spring onions, washed and tie into a knot

Spices:
10 g cinnamon sticks
10 g Licorice root
8 g star anise
5 g Sichuan peppercorn
1 Cao Guo
5 slices of ginger

Seasoning:
180 g sweet soy sauce
80 g soy sauce
1 1/2 tbsp salt
100g rock sugar

Tea-smoking mixture:
10 g tea leaves
50 g cane sugar ( coarsely chopped)
150 g uncooked white rice
10 dried rose buds (optional)

For thickening:
1 tbsp cornstarch
2 tbsp water
(Combine and stir until no lumps remain)

Methods:
1. Soy Sauce Poached Chicken:
Place all the spices ingredients in disposable soup stock pouch. Fill the pot with 2 litre water, add the soup stock pouch, bring to a boil then simmer for 1 hour. Add ginger, spring onions and seasoning into the stock. Bring to a boil then simmer for another 15 minutes. Add the chicken whole legs and poach for exactly 14 minutes, then turn off the heat and remove the pot from stove immediately. Allow the chicken to steep in the stock for 3 hours. After 3 hours remove the chicken from stock. Transfer the chicken to a plate.

2. To prepare the gravy:
Pour 1 1/2 cups of stock into a small saucepan, bring to a boil then stir in the cornstarch slurry and cook until the gravy is thicken.

3. To smoke the chicken:
Line the bottom of the wok with a piece of aluminium foil. Add rice, sugar, dried rose buds and tea leaves. Put a steaming rack in the center, then cover the wok with a lid. Heat the wok over high heat till the smoke begins to appear. Place the chicken on the rack and cover the wok with lid. Smoke the chicken for 8 minutes, then turn off the heat.

4. To serve:
Remove the smoked chicken from wok. Brush some sesame oil on the chicken then cut into pieces. Serve with dry tossed noodle or steamed white rice.


This post is linked to the event Little Thumbs Up (July 2015 Event: Tea) organised by Zoe of Bake for Happy Kids and Doreen of My Little Favourite DIY and hosted by Cheryl of Baking Taitai.


Monday, 20 July 2015

印度香料茶拿铁 Chai Latte

最近迷上印度香料茶拿铁,周末到咖啡座喝茶时都喜欢点这奶茶。暂时我试过了两家咖啡座的玛萨拉香料奶茶拿铁,两家的奶茶都不错,各有各的特色,不过几乎每个周末都去喝茶,点两杯饮料加一块蛋糕至少都要RM60,真的很高消费,继续下去真的有点吃不消。所以我就买了罐好茶,再加上一些香料,然后在家自己学煮印度香料茶拿铁。


印度香料茶拿铁的做法和传统的玛萨拉香料奶茶有一些不一样,之前曾煮了好几次玛萨拉香料奶茶,可是都未能达到自己满意的味道,所以就换了个食谱。这个食谱多数是用香料粉,所以香料味道会比较浓些,比较合我心意。香料茶的底茶通常用味道较浓烈的红茶,如阿萨姆红茶Assam,不过刚好没买到所以就用大吉岭红茶Darjeeling Tea来煮茶。今天的午餐就是一杯印度香料茶拿铁再加上比利时窝夫和一些新鲜的草莓,简单可是却很有满足感。


印度香料茶拿铁

(食谱参考Live Simply,做少许更改)

材料:
印度香料茶:
水 2杯
大吉岭红茶叶 2汤匙
小豆蔻 8个
丁香 2个
肉桂粉 1茶匙
姜粉 1/2茶匙
肉豆蔻粉 1/2茶匙
多香果粉 1/8茶匙
有机原蔗糖 2汤匙

拿铁:
以上印度香料茶 1/2杯
牛奶 3/4杯
有机原蔗糖 1汤匙
肉桂粉 少许

做法:
印度香料茶:
1. 在一个小锅里加入水及香料煮至滚,熄火然后让香料浸泡在水里5分钟。
2. 5分钟过后开火,然后加入茶叶及糖,煮至微滚即可熄火(此目的是为了让水的温度够热来浸泡茶叶)。让茶叶在水里浸泡5分钟,然后将茶过滤。保留半杯茶来准备拿铁,其他的香料茶可收入冰箱长达2星期。

印度香料茶拿铁:
1. 将牛奶、糖及少许肉桂粉放入一个小锅里加热至微滚,然后熄火。
2. 以奶泡器将牛奶搅拌大约45秒直到形成奶泡。
3. 把1/2杯印度香料茶加入杯中,然后将热奶和奶泡倒入。撒上少许肉桂粉,乘热享用!


Chai Latte

(Recipe adapted from Live Simply, with some adjustments)

Ingredients
Chai Tea:
2 cups water
2 tbsp Darjeeling tea leaves
8 cardamom pods
2 whole cloves
1 tsp ground cinnamon
1/2 tsp ground ginger
1/2 tsp ground nutmeg
1/8 tsp ground allspice
2 tbsp organic raw cane sugar

Latte:
1/2 cup chai tea (recipe above)
3/4 cup milk
1 tbsp organic raw cane sugar
pinch of ground cinnamon

Methods:
Chai tea:
1. In a saucepan, bring the water and spices to a boil. Whisk the spices in the water. Once the water reaches a boil, turn off the heat and allow the spices to steep in the water for 5 minutes.
2. After 5 minutes, turn the heat back on and add the tea leaves and sugar. Return to a slight boil (the goal is a hot liquid for steeping). Once boiling, turn off the heat. Allow the tea bags to steep in the water and spices for 5 minutes. Strain the tea through a fine mesh sieve. Reserve 1/2 cup of chai tea for the latte. Store the rest of the chai tea in the fridge up to two weeks for freshness.

Chai latte:
1. In a saucepan,  add milk, sugar and pinch of cinnamon, heat the milk till slight boil. Turn off the heat.
2. Using a milk frother, froth the milk for about 45 seconds until foamy.
3. Pour 1/2 cup of chai tea in a mug, then slowly pour the hot milk and foam into the mug. Sprinkle with some ground cinnamon and serve hot.


This post is linked to the event Little Thumbs Up (July 2015 Event: Tea) organised by Zoe of Bake for Happy Kids and Doreen of My Little Favourite DIY and hosted by Cheryl of Baking Taitai.


Tuesday, 7 July 2015

抹茶拿铁 Matcha Latte

以前拍拖时常和老公去咖啡座,不过由于我对咖啡比较敏感,所以一般我都会点巧克力饮料或抹茶拿铁。想想都有一段时间没喝抹茶拿铁了,我就上youtube找抹茶拿铁的做法,看了之后我发现一点也不难,买齐材料后就动手准备抹茶拿铁。Ochikeron的影片里有提到她的奶泡器是在Daiso买的,所以逛街时我也去了一趟Daiso买了一支奶泡器回来。其实之前想买奶泡器好久了,可是却碍于价格太昂贵而作罢,现在可好了,几零吉就可以买个奶泡器回来,经济又实惠。我依照食谱准备了抹茶糖浆,所以想喝抹茶拿铁时只需要加热奶,打出奶泡即可以了。只需花少许时间和一点心思,在家自己准备像咖啡座一样的抹茶拿铁其实一点也不难,那你还在等什么呢,赶紧动手吧!


抹茶糖浆


抹茶拿铁 

(食谱参考Ochikeron,这里 and 这里,作少许更改)

材料:
抹茶糖浆:
抹茶 1汤匙
有机原蔗糖 50克
热水 60毫升

抹茶拿铁:(1人份)
抹茶糖浆 1 + 1/2汤匙
牛奶 200毫升
抹茶粉 少许

做法:
抹茶糖浆:
1. 把抹茶粉和糖混合均匀,然后慢慢加入热水,以小型打蛋器搅拌至均匀。如需要可将糖浆过滤。将糖浆收入冰箱,可保存长达一星期。

抹茶拿铁:
1. 将牛奶放入一个小锅里加热至微滚,然后熄火。
2. 以奶泡器将牛奶搅拌大约45秒直到形成奶泡。
3. 把抹茶糖浆加入杯中,然后将热奶和奶泡倒入。撒上少许抹茶粉,乘热享用!


份量: 1杯 (容量250毫升的杯)


Matcha Latte

(Recipe adapted from Ochikeron, here and here, with some minor adjustment)

Ingredients:
Matcha Syrup:
1 tbsp Matcha green tea powder
50 g organic raw cane sugar
60 ml hot water

Matcha Latte: (for 1 serving)
1 and 1/2 tbsp Matcha syrup
200 ml milk
Matcha powder for dusting

Method:
Matcha Syrup:
1. Mix Matcha green tea powder and sugar very well. Add hot water little by little and mix with a small whisk. Strain with a strainer if needed. You can keep it in the fridge for about a week.

Matcha Latte:
1. In a saucepan,  heat the milk till slight boil. Turn off the heat.
2. Using a milk frother, froth the milk for about 45 seconds until foamy.
3. Add Matcha syrup to a mug, then pour the hot milk and foam into the mug. Dust with some matcha powder and serve hot.


Servings: 1 (250ml mug)


This post is linked to the event Little Thumbs Up (July 2015 Event: Tea) organised by Zoe of Bake for Happy Kids and Doreen of My Little Favourite DIY and hosted by Cheryl of Baking Taitai.


Wednesday, 1 July 2015

冰柠檬红茶 Iced Lemon Tea

这么多饮料当中我最爱的就是茶,无论是红茶、绿茶、黑茶、水果茶、花茶或凉茶我都爱。家里一般都是喝绿茶和红茶,我喜欢单喝,不喜欢加入额外的糖和牛奶,不过偶尔我都会做些特别的饮料来喝。相信很多人都喜欢喝冰柠檬红茶Iced Lemon Tea,不过一般在外面餐厅点的那些冰柠檬红茶都是用市售的柠檬红茶粉末泡成,饮料喝起来非常甜,而且没有柠檬和红茶的香味,所以我喜欢自己准备冰柠檬红茶,甜味和酸度可以依自己的喜好调整。


之前准备冷可可饮料时用了两个再循环的玻璃罐子,从那时开始我就很喜欢用这两个罐子来装饮料,罐子的容量刚刚好,而且只要加入简单的装饰就可以让饮料看起来很吸引人。最近的天气还是一样热,想请大家喝杯冰柠檬红茶,让大家冰凉一下,希望大家喜欢!


冰柠檬红茶

材料:
红茶袋 2个(每个2克)
水 400毫升
糖 2汤匙或更多
柠檬汁 2汤匙

装饰:
柠檬片
薄荷叶

做法:
1. 在小锅中加入水煮沸,然后从火炉上移开。把茶叶袋放入小锅里浸泡3分钟,取出茶叶袋,然后将茶叶袋弃之。
2. 加入白糖,搅拌至完全溶解,放置一旁让其冷却至室温。把茶收入冰箱了冷藏。
3. 把冰茶倒入装满冰块的杯中,加入柠檬汁,搅拌至均匀。以柠檬片和薄荷叶装饰即可饮用!


份量:2杯


Iced Lemon Tea

Ingredients:
2 black tea bags (2g each)
400 ml water
2 tbsp sugar, or more to taste
2 tbsp lemon juice

For garnish:
Lemon slices
Mint leaves

Methods:
1. In a saucepan add water and bring to boil. Remove from heat. Place the tea bags in the saucepan and steep for 3 minutes. Remove tea bags and discard,
2. Add sugar and stir till fully dissolved. Set aside and let it cool down to room temperature. Chill in refrigerator until ready to serve.
3. To serve, fill the glasses with ice cubes and pour the tea over the ice. Add lemon juice, stir to mix. Garnish with lemon slices and mint leaves. Serve immediately.


Servings: 2 glasses


This post is linked to the event Little Thumbs Up (July 2015 Event: Tea) organised by Zoe of Bake for Happy Kids and Doreen of My Little Favourite DIY and hosted by Cheryl of Baking Taitai.


Related Posts Plugin for WordPress, Blogger...